Well hi welcome to my little blog. Just my little corner of craftiness, sewing, and refashioning. I am also a newly gluten free eater so you have a little bit of recipes mixed in here.

Friday, February 28, 2014

Lettuce wrap GF "sandwich"

I have been messing around with some lettuce wraps. Today I just actually tried something different. I tried cabbage. I am trying out new options for gluten free "sandwich-like options". Today I am actually trying out cabbage with ground beef! So I simply cooked some ground beef.


Then cleaned up some cabbage. Added my ground beef (sans grease, but with seasoning.) with some cheese. Attempted to wrap it up. And lo and behold I have a sandwich! Actually pretty easy. I actually liked the way cabbage tasted. Plus it was super big!

Not bad, I would do again!

Cheers,
Lauren

Wednesday, February 26, 2014

Black ruffle shirt fix! Refashion #15

I actually purchased this shirt b/c well I love ruffles but there is a band at the bottom that wound up causing the top to poof....
Also as soon as I put it on the button fell off. Yet again another item I have purchased from Tulle just isn't up to par. The other was the flowered shirt. I digress.. I need to fix this top!


Basically what I did was remove the band from the button but left the button holes. I undid the pleats and redid them. Essentially now they are sort of moved and a little towards the back and sides. Now I don't look pregnant.


Never again will I buy clothing from the store Tulle. I have had so many issues with ill-fitting clothing or things just falling apart as soon as I put the clothing on. Even though I got them on clearance, not worth the money.

Cheers,
Lauren
84 left to go!

(btw does anyone know where February went?!!)

Monday, February 24, 2014

Iron craft: baby shoes, refashion #14

So remember that red wool coat I just refashioned? Come on.... I just refashioned it!

So I had leftover wool. I washed it and cleaned it up. It didn't really felt. But all good.

The next Iron Craft challenge was hearts and flowers. We could do something with either of the two. I wanted to do a refashion to keep attacking my 99 refashion challenge. I was looking through this book the other night and then I cam across these baby shoes.


OMG they were just adorable. And I had everything on hand to do these shoes!

So I cut out my pieces from the pattern they provided.

And googled how to blanket stitch, this site here made life really easy and clear. Grabbed some embroidery floss. Changed up the pattern using some scrap of my houndstooth fabric that literally was still on my table. And away I went to stitching.The directions were a bit wordy for me but I understood what I had to do- once I got the hang of it, it went fast! And hey I used up some of my floss! Made it my own. There was no way I wanted to add tiny button holes in wool. The houndstooth is a knit so it does stretch. Yeah! Done!!


OMG these are just too precious. I have more of the red wool leftover that I can probably make more.

Here's to using up things I have in my place! Yay! Hopefully I'll get more done in a few weeks and I'll post more!

Cheers,
Lauren

85 left to go!

Friday, February 21, 2014

GF Quinoa chicken vegetable soup

I was just messing around one cold Saturday and decided I would try my take on a chicken noodle soup. Some of the noodles I can eat, others I can't. I really miss a good soup on these cold days. I love hearty soups too.

So winged it. Grabbed 2 bags of frozen vegetables- the soup medley. Which have onions, celery, etc. Grabbed 2 boxes of the low sodium chicken broth. I threw in a cup of quinoa. Cook on high/ med heat to get them to start cooking. I also threw in some fresh ground pepper.

At the very end, I added fresh avocado to the mix, all nicely cut up. I had also cooked a chicken in the oven so I threw the chicken in there. OMG it was delicious!

The quinoa definitely plumped up and at the end it was almost like a stew. I did't care b/c it was so filling and tasty! Boyfriend also ate it up! We made it again (b/c again it is just so cold) and it was gone pretty fast. Super easy as it only took about 35 minutes total cook time! Yeah! And made a lot!! Not bad for making it up!

Cheers,
Lauren

Wednesday, February 19, 2014

Book Review: Day The red wool coat, refashion 13

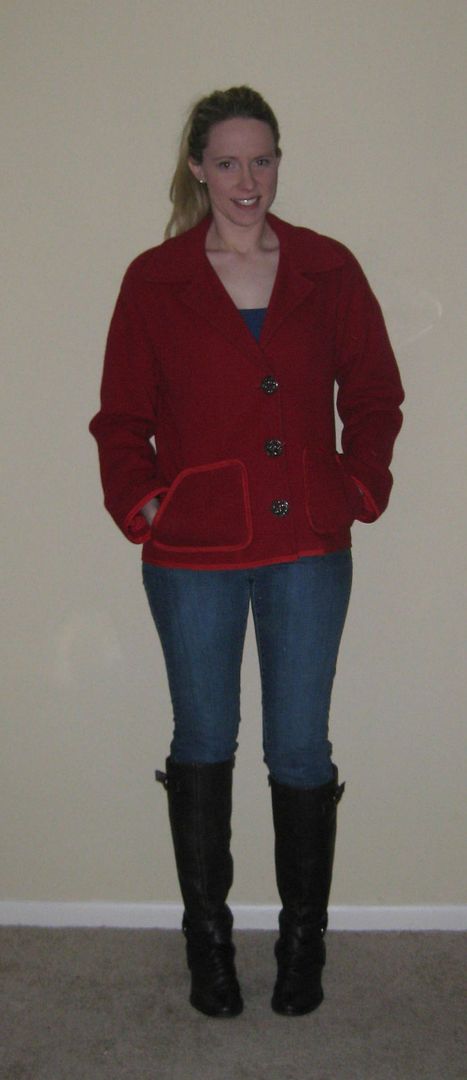
I mean sometimes you can not beat when things fall into place.... I found this red wool coat


OMG remember this company? Spiegel they were everywhere, way back when. 


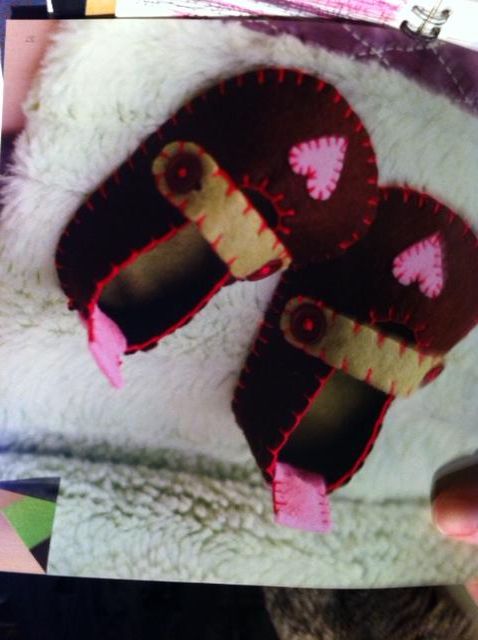
And in the book I wanted to do this refashion which had a red wool coat... but things did work out. So I did it my way.

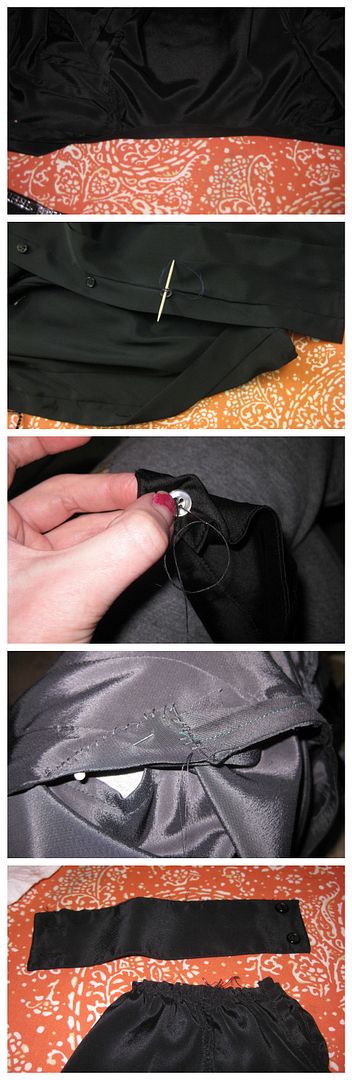
After realizing the coat had side gaps, which are worth NOTHING during the winter with wind. I needed to cut them off. Which meant I had to remove the pockets... OMG it was so dirty and gross.


I removed the lining to then tailor in the jacket. Both sides. 


Time to remake the pockets. Old ones were too big. And you also put your hands in via the top. I hate those kind of pockets. I wanted side pockets. I free handed what I wanted to do. I used my hand as a guide. 
I used red bias tape to finish the sides of the pockets. This wool was way to hard to try and get it to fold over. Big problem. So I used bias tape. Which look orange in pictures! I put then in the right place, pin, and sew-leaving the side open for my hands. I also used the bias tape for the bottom of the coat too. Then it might be hard to tell but I also took the top button off and placed it in the middle of the jacket. The buttons were really far apart. It is actually not functional. You can't tell, I added it in the right spot. ;) 

Done. Well sort of.... I tried to add the bias to the collar, I did. But it was too much.It overwhelmed the jacket. But I did go back and forth about adding it. I did add bias tape to the sleeves, to pull it together. 


Recap: Much less bulky! And I love the pockets. 

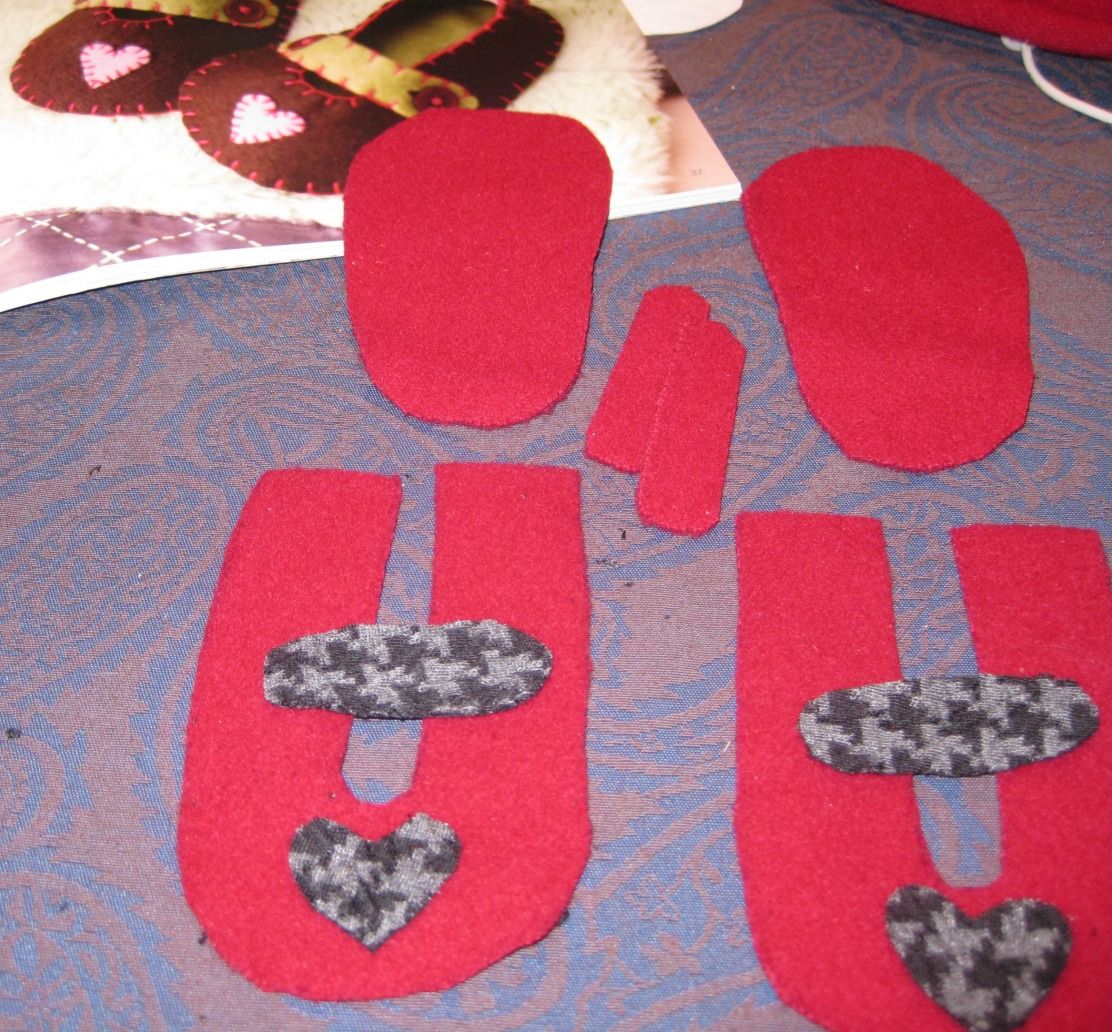
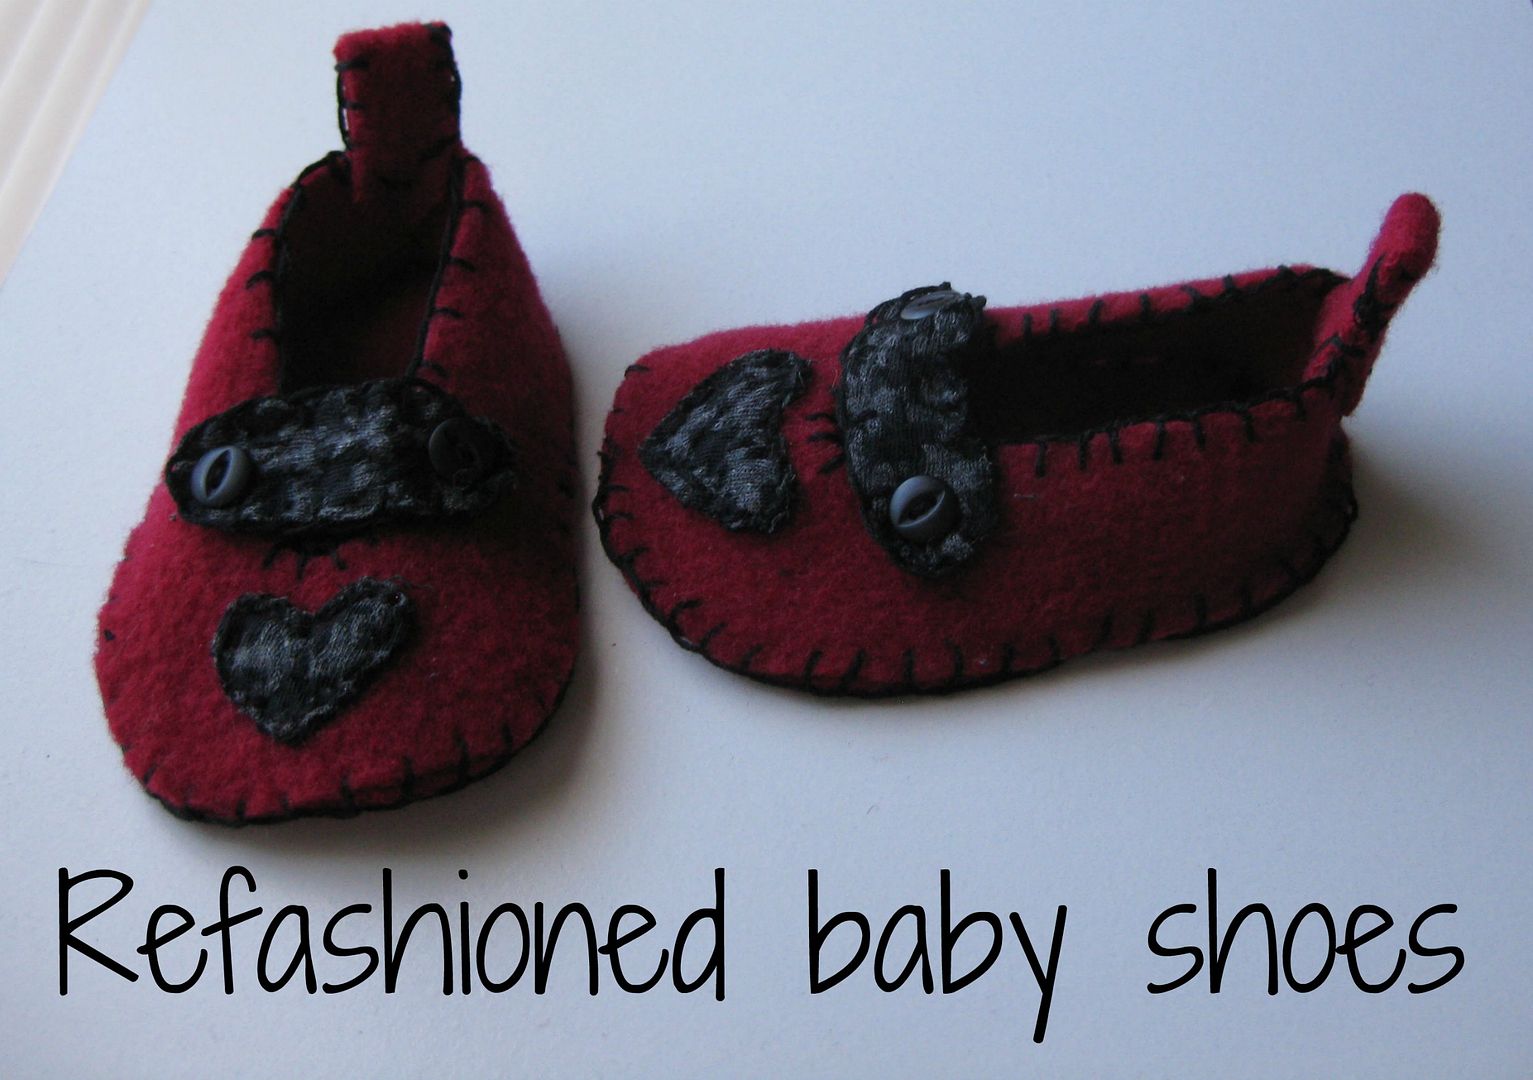
I still go back and forth about the bias tape but in all actually, I do like the new coat. Monday I'll show you my next refashion I did with the leftover wool. OMG they are precious! :)

Cheers,
Lauren

Monday, February 17, 2014

Black Pintuck Blouse fix, refashion #12

Happy Presidents day everyone! Hope you are enjoying your day off. Today is this nice black blouse I found that had sort pin tucks down the front of the shirt. It was a nice material. Though I realized it was a petite so I needed to make it work.

First issue was we had shoulder pads. Sigh. Pulled those puppies out. Next I got rid of the collar. I finished it with bias tape. Then I folded back the top of the neck (you can see the loop at my neck- can't button it!). Simply I just tacked it down to the lining portion of the top.
I also fixed the buttons at the time, which were white!! They are hidden by the design of the top. But they all almost all fell off just looking at them!! I thought I was done but.... me and my monkey arms did not realize that the petite length cuffs, which were supposed to close on my wrist, actually close mid forearm. Yeah. No! So I removed the cuff. Cut some off. Created a casing and added elastic. Done

You have seen the top with my jeans refashion so no big surprise here.


Nice and easy Vneck blouse. I'm pretty happy!

Cheers! (12 down 87 left!)
Lauren

Saturday, February 15, 2014

Snowflake dress! Yay!

Yay, got to love when things were easy. This was relatively easy, I got hung up on the pockets but not bad. The only problem I had was the dress was SCANDALOUSLY  short!!! I should have read the reviews first b/c everyone says that. The model is deceiving in the picture...

Here is my dress! I love it! It is really warm!!! One of the warmest dresses I have for the winter. Paired with some grey boots = love!!!


The cats love to be part of the pictures. So here we go. Sebastian my baby. 

This is the last of my fabric so no matching. 

You can barely tell I added about ~3 inches to the bottom. Good thing it is busy fabric. 


Now I will also add that the neckline didn't roll (it is a raw edge) like in the instructions. But it is all good! I love this dress!!!
Recap of the things I made with this fabric
1. this dress

2. long sleeve top

3. Leggings
Not much left of this fabric. :) Just scraps! Yay!

Cheers,
Lauren

Friday, February 14, 2014

GF cooking: southwest spaghetti squash

This is a fabulous recipe! We love it! Southwest spaghetti squash casserole.


It is from this book....

Ingredients:
1 spaghetti squash
1 can (~14 ounces) tomatoes- I used Rotel tomatoes with peppers, and I drained them-- recipe didn't call for that. I opted for Rotel since it does have a nice kick to it. You may not want this.
1 can ~14 ounces black beans, rinsed and drained
3/4 cup shredded Monterey Jack cheese
1/4 chopped cilantro
1 tsp ground cumin
1/4 tsp garlic salt (I didn't have and just used garlic powder)
1/4 black pepper


Directions:
1. Cook squash at 350 degree on a cookie sheet. Cut them in half and put face down on the cookie sheet. Bake for 45 minutes to 1 hour. Remove. Let cool for a bit.
2. shred squash with fork into a bowl.
3. Add all ingredients saving 1/4 cup of the cheese for the topping. Mix together well. Transfer to a baking dish. Sprinkle with the remaining cheese.
4. Bake uncovered for 30 to 35 minutes. Serve!


We had just a little bit of liquid on the bottom. I don't think I got all the juice out from the tomatoes.

Nom. OMG this was fabulous on the cold winter days. Helps clear you up! And keep you warm!

My boyfriend went bananas over this dish. Which at first he was like, er well I guess I will try it. Then after he did, it was inhaled. I have made this again and it was still delicious! We definitely have a winner here. I highly recommend!

Cheers,
Lauren

LinkWithin

Related Posts Plugin for WordPress, Blogger...